InMultifamily has a visual scenario editor that enables you to create and edit your Multifamily scenarios.
Go to Scenarios and click Create a new scenario to open scenario editor.

To modify an existing scenario, choose the "Edit" option. Alternatively, you can open the scenario editor by clicking on any part of the page where the existing scenario is displayed.
Below is a list and explanation of all of the elements in the scenario editor.

Within inMultifamily, the modules correspond to discrete stages in your automated workflow, and there are various module types available.
The number of modules you can incorporate into your scenario is unlimited, although the number of operations allowed may be restricted by your subscription plan.
To enable inMultifamily to interact with a specific application, you must first establish a connection.
Depending on the type of module you have chosen, you can access the following options by right-clicking on the module:
Settings
Run this module only
Add a module
Add error handler
Rename
Close
Copy module
Add a note
Delete module
The schedule settings panel in inMultifamily permits users to modify the frequency and timing of their scenarios. The default setting is for scenarios to run every 15 minutes. However, this panel enables you to personalize the schedule to meet your specific needs.
To schedule a scenario, simply click on the clock icon. Alternatively, you can access the schedule settings by clicking on the "Schedule settings" option in the toolbar.

Inside inMultifamily, the clock icon serves as a symbol for a scheduled trigger, which marks the beginning of your scenario. It is worth noting that scenarios can also begin with an instant trigger, which is depicted as a lightning icon ( ).
).
If you wish to gain a better understanding of the various types of triggers, further research is recommended.
a route refers to a linkage between two modules, which is denoted by a dotted line.

To access the options associated with a route between two modules inside inMultifamily, click on the wrench icon ( ) located below the route. This will bring up the following choices:
- Set up a filter:
- This feature enables you to sift through bundles using certain criteria. It is also accessible via the route connecting the two modules.
- Unlink:
- By choosing this option, the module in question will not be executed unless it is a trigger.
- Add a router
- Add a module
- Add a note
You can add a new module to your scenario by hovering over the right handle of an existing module until a plus sign icon appears. Clicking on this icon will generate an empty module.
A menu containing a selection of apps and services will then appear, providing you with the option to add another module to your scenario.

In order to remove a module from your scenario in inMultifamily, you can right-click on the module you wish to delete and select the "Delete module" option.
After configuring your scenario in inMultifamily, you can test its functionality by clicking the "Run once" button. Following execution, you will be able to view the number of operations performed, as well as more detailed information in the log.

An operation denotes a specific task carried out by a module. Following the execution of your scenario, the "inMultifamily" platform will showcase the number of operations performed by each module in a white bubble situated in the top-right corner of the relevant module.
By clicking on this bubble, you can examine the outcomes of the module's operation in more detail.

In inMultifamily, the total number of operations performed by the modules in your scenario determines the corresponding charges you will incur. If you require further details on how to calculate the number of operations, please refer to the relevant resource on the topic.
T log is a record of every event that takes place during a single run of your scenario. This information is then stored in the scenario execution history. The log will provide you with details regarding each step of the process and any errors that were encountered during the execution of the scenario.

Once you are satisfied with the performance of your scenario in inMultifamily, you can choose to activate it. This can be done by selecting the "ON" option to enable the scenario, or "OFF" to deactivate it.

For more information on active and inactive scenarios in inMultifamily, please refer to the relevant resource on the topic.
If your scenario is not performing as anticipated, we recommend consulting the error handling section of the platform for assistance.
To exit the scenario editor and navigate back to the scenario detail page in inMultifamily, click on the left arrow icon located in the top-left corner of the screen.

In inMultifamily, you can change the name of a scenario by following these simple steps:
- Click on the current scenario name located in the top left corner of the screen.
- Edit the name to your desired new title.
- Press the "Enter" key or click outside the edited field to save the new name.
- Finally, select the save icon (save_icon_.png) to complete the process and save the new name for your scenario.

This section of inMultifamily provides additional details about Controls, Tools, and Favorites for your reference.


Please not that inMultifamily, scenarios do not save automatically. In the event that you exit the scenario editor without saving your changes, a pop-up windo will appear prompting you to do so. If module settings are not saved, you will see an asterisk icon on the top of the relevant module unitl you either press "Cancel" to discard your changes or "OK" to save them.

Click the gear to open the scenario settings.

In inMultifamily, you can add a note to either a module or the route connecting two modules by following these steps:
- Right-click on the relevant module or click on the route you wish to attach a note to.
- Select the "Add a note" option.
- Enter your note into the provided space. There is no limit to the number of notes you can add.
- To view or hide any notes that have been added to your scenario modules, click on the page icon.

Using inMultifamily, you have the opportunity to build complex scenarios incorporating multiple modules. To ensure a clear and organized layout, simply select the "magic wand" icon. This will adjust the positioning of all modules within the scenario to create a more uniform and aligned appearance.

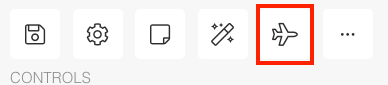
Inside the inMultifamily platform, prior to executing your scenario, you can use the "airplane" icon to visualize the flow of data between modules. This feature allows you to gain a better understanding of how information is being passed between modules and can be a useful tool for troubleshooting or optimizing your scenario.
Was this article helpful?
That’s Great!
Thank you for your feedback
Sorry! We couldn't be helpful
Thank you for your feedback
Feedback sent
We appreciate your effort and will try to fix the article